Showing posts with label tutorial. Show all posts

Monday, 7 April 2014

Mini tutorial - Conditioning extremely crumbly clay

Several years ago I switched from using Fimo Classic to Sculpey Premo!. Although I like FC for many things, I found it very hard to condition and at the time I was suffering from RSI so also found it quite painful to knead the stiff clay. I hung on to my Fimo stash, but switched to the softer Premo! for almost everything. I had almost forgotten I had the Fimo until a couple of weeks ago when a customer commissioned me to make some earrings to match one of the older focal beads in my Etsy shop. I wanted the earrings to match exactly, so I knew I would have to use the same brand of clay to make them (actually, the same packet of clay as it turned out). So I dug out the Fimo and this is what I found...

The clay was rock hard and very crumbly. It was impossible to work. In fact, it was so hard that I wondered if I would even be able to use it. But I had a block of MixQuick in my toolbox and an order to fill, so I had nothing to lose.

 You can see how dry the original clay was. In fact since I tend to use Sculpey additives with Premo!, the MixQuick was quite dry too!

 I chopped the pink Fimo Classic into thin slices and let it crumble. This is quite a messy technique, so make sure you work on a large tile and that you lay plastic on the floor if you have carpet or you'll be picking crumbs of clay out of the shag pile forever.

I started with about a third MixQuick and chopped it up along with the Fimo Classic.

Close up.
It stayed very crumbly for a long time and was very hard to work. I had to rub the mix through my fingers as if I were rubbing fat into flour to make pastry. I rubbed then squeezed the mass together, then rubbed some more. I tried to manipulate the clay as much as possible but I think Fimo reacts to heat rather than manipulation (unlike Premo! which becomes softer as it is worked). I added a little more MixQuick but kept the proportions 2:1 Fimo:MixQuick.

Eventually the mass started to come together. Most of the clay held together in a ball with just a few crumbs. I could see that the MixQuick and the Fimo Classic were not thoroughly mixed as the colour was streaky.


Finally, I could roll the clay well enough to make snakes, which I chopped up and recombined to help it mix. Miraculously, by the time the streaks were gone, the pink clay was a workable consistency! I did the same with a batch of orange in an equally crumbly state and it came out just the same, so it could be done with the rest of my clay just as successfully.

This is the bead I copied and I was amazed that the earrings were a perfect colour match and the clay was good enough to make a jelly roll cane and form barrel beads.


Thursday, 6 March 2014

Mini tutorial - Improvised bead rack

This is hardly a tutorial so much as a shared idea. If you only occasionally make beads a dedicated rack can take up too much valuable space in your craft room. On the fairly rare occasions that I make beads I improvise a rack using large cutters like this, the top of a can that doubles as a bangle mould, or a shallow box (Green and Blacks miniatures boxes work very well, you just need to reinforce the corners with tape as repeated baking in the oven weakens the glue).

So there you go - see how inventive you can be!

Monday, 15 July 2013

Mini-tutorial - Tissue blade holder

Firstly I make no apologies for the gap between posts this time - it is SUMMER! The sun is out and it is gorgeous in the UK. People have stopped complaining about the gloom... and started complaining about the heat. Summer is here at last :)

Today I'm going to share with you a little contraption that has become so much a part of my toolkit that I had forgotten that it was something I even made. It's just always there, by the side of my ceramic tile, and I take it utterly for granted. So, in honour of my little tissue blade holder that sits so patiently doing its job and asking nothing in return, here is my tutorial for making one of your very own to take for granted for many happy years to come.


Here it is in all its glory. Basically what this little thing does is keep your blade upright, with the sharp side pointing downwards, so it is always easy to pick up. Tissue blades are thin - when they're lying flat on something they're really hard to pick up, and I always end up sliding them to the edge of whatever surface they're on, or scrabbling with my fingertips to get a grip on an edge. If we were in a lab this would be totally unacceptable from a Health & Safety point of view. Keep that blade visible, easy to pick up and sharp side down!

Here are a couple of close ups so you can see what the tissue blade holder looks like properly. From above you can see the groove where the blade sits is quite narrow.


From the side you can see how far down to cut the groove.


Anyhoo, on with the making part. This is ridiculously easy! Take a small handful of clay - scrap is fine if you have it, if not then choose a colour you like. Roll it into a ball. If you want to add a veneer add it now and smooth it all over, or if it is precious, wait and only cover the visible part of the holder.

Once you have a ball of clay, press it down onto your worksurface and flatten the bottom until you have a dome. It should be about the same size and shape as a chocolate marshmallow teacake. (Totally gratuitous teacake shot coming up... ta daaaa)


I joke, but this really is just the right size and shape for your tissue blade holder. So, once you have your domed ball of clay, the next step is to cut a groove in it for your tissue blade to sit. To do this: hover your blade on top of the dome, look down on it from above and centre it, then cut down, about 2/3 of the way through the dome. (Obviously you don't want to go all the way through, otherwise you'd just be left with two halves - 2/3 is about right as it is enough to hold the blade steady, but leaves enough of the base of the dome intact so the holder remains solid.)

Here's that side view again so you can see what I'm talking about - or it would be if Blogger didn't decide you can only link to photos older than the one you previously linked to. (Why do you do that Blogger? Why do you live in the past? Did someone hurt you?)

Basically you're gonna have to look at the one further up the post. Blogger is being a tad passive-aggressive today. Here's a picture of a baby armadillo to make up for it. (BTW - never ever make a typo when searching for cute baby armadillo pics on the internet. An image of an Armadildo is not something you want burned into your retinas for all time. Yeesh.)


Once you have made the initial cut, wiggle the blade around slightly to widen the groove. I tend to focus on widening the groove at the top, and leave the bit at the bottom quite tight. You could stick two tissue blades in side by side if you wanted to, to make the groove wide without mashing it up too much.

And that's it. I wouldn't fiddle around with it too much at this point or you risk distorting the groove and then the blade might not fit. Stick it in the oven and bake it, and then worry about fixing any minor imperfections after it is cured. Once cured it can be sanded and polished and finished in any way you like. Just avoid sanding the groove too much, or adding any sort of finish into the groove that might dull the tissue blade.

So there you go. Make a load and give them to your clayer friends. Make custom ones - try one for a ripple blade. Make one to stick your needle tools into. Get creative. And feel free to send me pics (...of your tissue blade holders. Unless of course you're really really ridiculously good looking, or you're an ageing bazillionaire looking for a wife and you're sending me pics of your mansion, your olympic-sized swimming pool and your most recent ECG*.)

*I'm  kidding. Pretty sure Mr Blind Crow would disapprove of that, unless you're also looking for a pool guy / masseur and when you croak you're willing to leave all your posessions to your new wife and pool guy / masseur ;)

Friday, 3 May 2013

Customising casts and mouldings (A mini tutorial)

I have been very remiss. It has been a fortnight since my last blog post (say 4 Hail Marys and 2 Our Fathers). I have been very busy with custom orders, authors and coping with not having a camera. It has really cramped my style! I could write a whole blog post on just that, but I'll link to one instead, and we can focus on a tutorial - it's been toooooo long since my last one!

So what I want to show you today is how to customise casts you make from moulds (molds). Now, this may seem like the most obvious thing in the world to you, but it was a bit of a Eureka moment for me. I can't even claim credit for this simple conceptual shift - credit for the idea goes to generous and creative polymer clay artist Ponsawan Sila.

The concept is forehead-slappingly basic. Essentially, when you peel a casting out of a mould, rather than view that as the finished item, instead view it as a blank canvas. Take this blank and tweak it to make something amazing and one of a kind. Is it a face? Add nostrils, refine the cheekbones, draw the edges of the mouth up into a smile. These are all tiny changes you can make, but you can also make bigger ones - open the eyes by putting in a pupil and eyelashes along the top of the eye socket, even make it wink!


And the customisations don't have to stop at the raw stage. Once cured, use gilding wax to highlight the forehead and bridge of the nose, or a fineliner to draw in Maori-style tattoos. Here I have used a cotton bud to create a triple goddess symbol )O( and a pin to create eyelashes.


As I mentioned above, this is a such a simple shift in thinking but it has had quite a huge impact on me. I had been quite ambivalent about moulds in the past - in fact the faces came from a friend - but with this notion of the moulding as a blank canvas my curiosity has been well and truly piqued. I can make OOAK items with a mould! The same goes for moulds of other items, especially big ones where you only like part of the mould. Either only impress the area you like, or trim away the rest of the casting. Think of patterned moulds like texture sheets - if you have a cavity and you want to transfer the pattern to a sheet, try casting the clay by pressing it into the cavity and making it concave, and then carefully removing the dome and squashing it flat. Like this. Here the large mould second from the left has been used to make a flat mica shift pendant (which I then curved slightly over a light bulb after I had smoothed out the mica shift texture which is why it is domed.)


I hope all of this has gone some way towards inspiring you to dig out your old moulds that you thought were limiting and to breathe some creative new life into them.

Friday, 29 March 2013

Rings! (sort of tutorial)

I've been reading a lot on Pinterest lately about rings made from polymer clay. There are various ways to do it - I've tried using silver-plated blanks and finishing them with resin, which is nice, but I wanted a different challenge and to make something a bit different. So when I saw my aunt's birthday on the horizon I saw a chance to get crafty and here is the result!

Please bear in mind that this is the first time I've done this, so there's probably lots of room for refinement. I also only decided to do it after I had made the clay plug, so even I don't know the details of how to get an exact replica, only the method :)


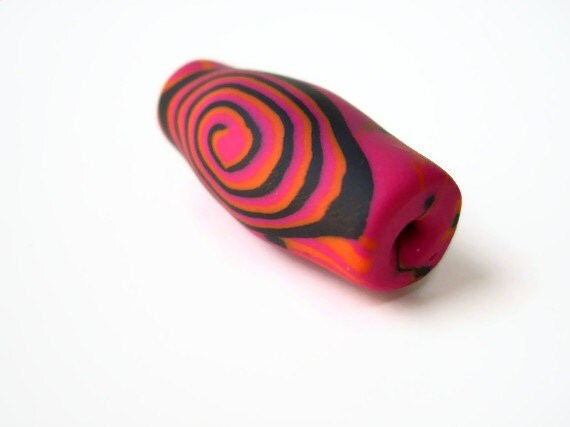
Let's start with a beauty shot to whet your appetite. Something like this is what we'll be aiming for. So to begin, build yourself a plug of clay. I chose to layer mine so that when we come to shape the clay later the layers will show as colourful strata in the ring. Make sure you adhere the layers well so that no air bubbles are trapped inside and all the clay is well stuck to itself. If you're making a plug in a single colour (bo-ring!) the best way to ensure you have no air bubbles trapped inside is to run the clay through the pasta machine on the thickest setting then slice the sheet and layer it into a stack in the same way as you would if making a multicoloured stack. It's fairly quick to do and ensures no air bubbles or gaps, which is important otherwise you can end up with holes in your finished ring other than the big hole you intended to be there ;)

Once you have your plug, you need to cut out a ring blank. Lots of tutorials skip this step and just bake the whole plug, but I'm not a fan of baking more clay than I need to bake, nor of sanding and carving any more than absolutely necessary. Do yourself a favour and cut out a blank. It takes a few seconds and saves clay, time, and landfill.


These are my blanks, next to the cutters I used to make them. First you want to cut your plug so it is the right thickness. What's the right thickness you ask? Slightly thicker than you want the final ring to be. Then take that slab and the oval(ish) cutter and cut out the basic ring shape. I allowed more clay at the top of the ring as I wanted to create a carved shape there later. (If you want a ring that is even all the way round you could use a round cutter for this step.) Once you have done that, you're going to want to cut out the inside of the ring. I measured this in a rough way against my engagement ring (see pic below). You could use anything you want. My ring just happened to be handy (ha - you see what I did there? ;)) and I had a kemper cutter that fitted it almost exactly.


You'll be left with a nice neat hole and a little plug of clay. I saved the little plug - I don't know what for yet but I'll think of something. Gauges for modified ears perhaps? Anyway I had spent too long layering up the clay to just add it to the scrap pile. YMMV.


The next step is to bake the blank. Bake it on the tile (you don't want to risk deforming the inside hole by moving it and the clay is fairly thin at this point). I gave mine a bit of extra time since I wanted to be sure that it was fully cured.

When it comes out of the oven leave it to cool on the tile. I like to leave it overnight since I feel the clay firms up even more after baking, so I never sand or work freshly cooled polymer if I can help it.

Admire your ring blank. If you've been neat, it almost looks like you could wear it right now. (Gratuitous here's-stuff-I-made-earlier shot with my ring blanks in the top right corner.)


When you're finished admiring your blank it is time to get down to business. You need a scalpel or other sharp whittling tool, a safe surface (like a ceramic tile), a paper towel or piece of denim (NOT your jeans - if the knife slips the denim is to protect the blade from hitting ceramic and getting damaged. If you use your jeans it will protect the blade, but only by slicing through you.) You might want to look through the blade shapes you have on hand and choose one that is sturdy and easy to handle. I like this curved blade best because I can hold it comfortably and if it slips it tends to cut out of the clay rather than gouge deeper. Note that in this pic the sharp edge is pointing upwards.


VERY CAREFULLY start to carve your blank. I would start with one side and start carving at the top where there is most bulk. Cut shallow, small bits to begin with. Mistakes are easier to conceal if you haven't removed too much material, and the knife will be easier to control if it doesn't have to plough through a lot of clay at a time.

Take your time and ALWAYS CUT AWAY FROM FINGERS, HANDS AND YOUR BODY. Work your way around your blank shaving off little bits here and there until you get the rough shape.


Now you're going to want to start smoothing it. Start with a low grit wet and dry sandpaper - I used 240 and 380 because they are what I had available. Sand lightly and rub the paper against the ring rather than the other way around otherwise I have found that all I end up doing is rubbing the grit off the paper. Wet the ring rather than the paper, and aim for it to be just wet enough to stop dust rising. Rinse the ring regularly as you go along as if you get the sanding technique right the polymer will abrade fairly quickly.


Work up through the grits. I used 240, 380, 600, 800 and 1200. At each grit make sure you work every surface, not just the ones that will be visible. A ring gets worn in one of the most sensitive areas of the body (the finger, pervert!) and so it needs to be smooth all over. For this ring I wanted the sides to be gently curved to show off the stripes, so I worked the clay against the sandpaper in the palm of my hand rather than against a flat surface.

If the ring is for you, try it on regularly as you go to ensure it fits. If it is too small, it is easy to sand off a bit more to make it fit.


Once you like the design and it is sanded all over it's almost done. Buff the ring against a piece of denim (you can safely use your jeans at this point) to bring up a shine and there you go - a lovely, tactile and one of a kind ring, made by you, from scratch.


This ring turned out pink on one side (bottom pic) and purple on the other (top pic). Kinda cool since those are two of my aunt's favourite colours :)

(Important disclaimer: scalpels and other sharp blades are SHARP (duh), so you need to take extra care to avoid injury. I accept no liability for any loss or damage arising as a result of you reading this tutorial.)


Saturday, 16 March 2013

Silicone mould experimentation - part 2

Impending carb coma aside, today has been a very productive day. Over the last few days I have had a play with the silicone moulds from my first and second attempts (see part 1) and some clay leftover from a custom order.


It was a mixed success. I learned why press moulds need to have a wall round them - basically a thick wall around the edge of a mould makes it harder to deform the cavity when pressing clay into it. My cabochons came out a little wonky as result of using a mould that was too thin-walled but I managed to ease them back into rounds.

So here's what this whole experiment has all been about - what do things made with these moulds look like? Well, I sanded and polished a few items and here they are. I love the magic of gilding wax :)


Before and after - adding gold-coloured gilding wax turns a textured surface into a lovely design.


The cabs on the left will probably become rings once I can find a decent blank for them. I think they'd make cute Boho-style summer wear.


This makes a nice earrings and pendant set. I think the pendant would look great strung on a steel torque in the same gorgeous green colour. Next time I might find a way to create an integral bail like the pendant below. The trick will be how to support the pendant for curing so the bail on the back isn't squashed and neither is the relief pattern on the front. 


And here I tested another mould with a different technique. The mica shift was accidental - I was aiming for mokume gane to bring out a turquoise layer underneath - but the gold looks effective against a contrasting blue steel torque :) I love how this spiral mould has come out - I'll definitely be using it for more experiments. It has a sort of Newgrange/Pictish look to it I think.

My next experiment with caulk will be making two-part moulds. I have a few double-sided charms and round beads that I'd like to be able to reproduce in polymer to turn into custom stitch markers and needle organisers.


Friday, 15 March 2013

Silicone mould experimentation - part 1

I love trying something new, and I love it even better when I can get stuck in and discover things for myself. I'm a huge fan of Pinterest, and have been hoarding tutorials and ideas for a couple of months now. (Follow me if you like). Some of the tutorials on there are hit and miss (you can often click through to some wonderous new invention like the replacement for Mod Podge for example and find a heartfelt plea from the original poster saying that they never made the claims that pinners on Pinterest are making), but some of them are pure gold.

Silicone moulds from silicone caulk is pure gold!

I have been having so much fun. Like my namesake I am a collector of shiny things, and I have a big bag of charms and trinkets that I have collected over the years with a view to making moulds out of them. With 2-part silicone putty being so pricey I put it off and put it off until I discovered this tute.

In great Blue Peter style, here is my own version. Enjoy (and try not to slice your fingers open on the mixing blade when you're washing it later like I did. Repeatedly!)


So here is my tray of trinkets. And below is my set up. I used a ceramic tile for mixing (not the best option as I will explain later), a mixing blade, cornflour (cornstarch), and 151 Silicone in white from the *gasp* pound shop! This has proved to be very economical since not only was it cheap to buy, but because it is in a metal tube I can squeeze out as much as I need and then put the cap back on. I've used the same tube three times so far and the silicone is still fine.


What I did was pretty haphazard. I squeezed out a biggish blob of silicone (looked like toothpaste but stickier), then I added roughly the same amount of cornflour and I mixed it using the blade until I got a paste. (No pics as I had silicone and flour everywhere and a brand new cameraphone ;))

Once it was thoroughly blended I added about the same amount of cornflour again and mixed it in. What I was looking for was for the silicone to become doughy enough to come away from the blade, which would mean it was ready for handling. Once it did that, (again no pics), I stuck on a latex glove and kneaded it a bit. I couldn't knead it too much as it still wanted to stick a bit to the glove, but I managed to wrestle it into a nice manageable blob (a patty, for all you Americans. We Brits, we say blob and we're happy :)).

This is where I made my first mistake. I pressed my blob down onto the ceramic tile and pressed a trinket (a pretty pendant from a local bead shop) into the mass. I smoothed the edges a bit and then very reluctantly went downstairs for a while to try to think of something else while the silicone cured.

MISTAKE! When I came back much later and came to remove the mould I found that the silicone had stuck very firmly to the ceramic. Why? Because silicone bath sealant is designed to stick very well to ceramic! Doh! Fortunately I managed to slide a tissue blade under the edge and slice it off. The mould is fine, but the ceramic tile has a residue that won't quite come off. I don't know yet if that will affect polymer clay if I use it as a work surface, but I wasn't too impressed anyway.

Still, the mould came out very well, with lots of detail. Not bad for a first go.


SECOND ATTEMPT

I learned a lot from  my first go, so I decided to try again with a few modifications. This time I tried using foil as a work surface, so I could peel the backing off the mould once it had cured. This worked OK, but silicone also likes to stick to aluminium (note the second "i", Americans! ;)) and the foil tended to rip, so it wasn't my best solution.


I also tried using baby oil as a lubricant (yes for the silicone. Get your mind out of the gutter. Actually I posted a very provocative post on FB alluding to using baby oil as a lubricant and not one person rose to the bait. I was a bit disappointed to tell the truth, so go on, I'll allow you a couple of eyebrow waggles and an ooh matron. Go on. Get it off your chest.) Anyhoo, the baby oil worked well up to a point. It stopped the mould from sticking so much, but it had its downsides. It also made everything quite slippy, and it was hard to manipulate smaller moulds as they kept sliding off the foil. It also seemed to slow down the curing rate, and the moulds stayed shinier and slicker on the outside than with corn starch.

With the slower curing rate and the reduced stickiness I was able to trim the edges off larger moulds and knead them to make more moulds. The extra working time on the silicone was good, but I got carried away trimming the edges off and reusing them and ended up with at least one mould that was too thin-walled to use, so it was a false economy. See the one on the left of this pic - it is very floppy and the bottom is extremely thin, so it is hard to get a decent moulding from it. The one on the right deforms much less when I press polymer clay into it.


THIRD ATTEMPT


For the third attempt I made a couple more changes. I used baking parchment as my work surface, and extra cornflour as my lubricant. Mixing was messy because the parchment scrap I was using was way too small, but if it were sellotaped to the table or some other surface for stability I think it would be the best thing to use out of the three (ceramic tile vs foil vs baking parchment). I also liked the extra cornflour as a lubricant - I dusted it liberally all over the work surface as if I were rolling out pastry and then put my blob of kneaded mix on top. It was the messiest option, but it did mean that the silicone cured much faster (water in the cornflour acts as a catalyst, so extra cornflour means faster curing). It also meant that as soon as the moulds were firm enough I could move them onto another surface and out of the way.

I grouped my trinkets into themes, so I could do several smaller objects on one mould. Here is my Celtic batch. This one was from my third mix, and if I didn't know it had been made from caulk I wouldn't have been able to tell. It is detailed, smooth and flexible. Oh, when you're pushing in your objects to mould don't push them too hard. The triangle-shaped hole is a triquetra bead that I pushed in too deep, and it has almost come through the bottom of the silicone, making it weak.


That's enough for now. I'll post about my first go at making jewellery with them in part 2.