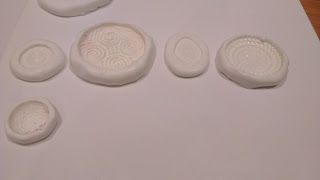
It was a mixed success. I learned why press moulds need to have a wall round them - basically a thick wall around the edge of a mould makes it harder to deform the cavity when pressing clay into it. My cabochons came out a little wonky as result of using a mould that was too thin-walled but I managed to ease them back into rounds.
So here's what this whole experiment has all been about - what do things made with these moulds look like? Well, I sanded and polished a few items and here they are. I love the magic of gilding wax :)
Before and after - adding gold-coloured gilding wax turns a textured surface into a lovely design.
The cabs on the left will probably become rings once I can find a decent blank for them. I think they'd make cute Boho-style summer wear.
This makes a nice earrings and pendant set. I think the pendant would look great strung on a steel torque in the same gorgeous green colour. Next time I might find a way to create an integral bail like the pendant below. The trick will be how to support the pendant for curing so the bail on the back isn't squashed and neither is the relief pattern on the front.
And here I tested another mould with a different technique. The mica shift was accidental - I was aiming for mokume gane to bring out a turquoise layer underneath - but the gold looks effective against a contrasting blue steel torque :) I love how this spiral mould has come out - I'll definitely be using it for more experiments. It has a sort of Newgrange/Pictish look to it I think.
My next experiment with caulk will be making two-part moulds. I have a few double-sided charms and round beads that I'd like to be able to reproduce in polymer to turn into custom stitch markers and needle organisers.


No comments:
Post a Comment
I welcome your comments, your humour and your support. Please remember that I and any other commenters on here are real people and play nicely. Thanks.