Showing posts with label premo. Show all posts

Monday, 21 July 2014

Experiments with polymer clay: Hair toys (sticks and forks)

Yeah, boring title I know. The reality (for a craft nerd like me) is far from boring.

Summer is always my best clay time. I can sit in our kitchen overlooking our little garden and work until much later than in winter because the light is so much better. Have you ever tried mixing a gorgeous colour one evening only to find it looks totally different the next day? That's electric lighting giving everything a yellow cast. Always do your colour mixing in natural light. (Using reliable colour recipes is the only exception, but even then natural light is better.)

But that's not what I want to talk to you about today. Today I want to talk about hair toys! Besides the ridiculous name, hair toys have a lot going for them. Once you've figured out how to use them (which with YouTube is very easy) they'll quickly become your favourite way to tie up your hair. They come in two flavours - sticks and forks. Sticks are essentially short chopsticks of 6" or less in length, and forks usually have two or three tines and are usually 5" or less in length. They can be made from many different things, but nobody seems to have fully explored their potential in polymer clay. Yet.

Well, I've been having a play and so far my results are encouraging. Cue photo montage and Eye of the Tiger soundtrack ;)

6" Hair stick 1


The tip broke off my first hair stick as the armature didn't go all the way to the end, so I had another go with a longer armature. Here is 6" hair stick 2 (plus pics showing carving and sanding).


And a prototype for a hair fork. I was not at all confident that this one would work so I have used scrap clay and haven't sanded or polished it. It's holding up alright so far though. I have put it into my hair on two occasions and it has survived.

4" Hair fork


All back-of-the-head photography is my own. The things I do for science ;)


Monday, 7 April 2014

Mini tutorial - Conditioning extremely crumbly clay

Several years ago I switched from using Fimo Classic to Sculpey Premo!. Although I like FC for many things, I found it very hard to condition and at the time I was suffering from RSI so also found it quite painful to knead the stiff clay. I hung on to my Fimo stash, but switched to the softer Premo! for almost everything. I had almost forgotten I had the Fimo until a couple of weeks ago when a customer commissioned me to make some earrings to match one of the older focal beads in my Etsy shop. I wanted the earrings to match exactly, so I knew I would have to use the same brand of clay to make them (actually, the same packet of clay as it turned out). So I dug out the Fimo and this is what I found...

The clay was rock hard and very crumbly. It was impossible to work. In fact, it was so hard that I wondered if I would even be able to use it. But I had a block of MixQuick in my toolbox and an order to fill, so I had nothing to lose.

 You can see how dry the original clay was. In fact since I tend to use Sculpey additives with Premo!, the MixQuick was quite dry too!

 I chopped the pink Fimo Classic into thin slices and let it crumble. This is quite a messy technique, so make sure you work on a large tile and that you lay plastic on the floor if you have carpet or you'll be picking crumbs of clay out of the shag pile forever.

I started with about a third MixQuick and chopped it up along with the Fimo Classic.

Close up.
It stayed very crumbly for a long time and was very hard to work. I had to rub the mix through my fingers as if I were rubbing fat into flour to make pastry. I rubbed then squeezed the mass together, then rubbed some more. I tried to manipulate the clay as much as possible but I think Fimo reacts to heat rather than manipulation (unlike Premo! which becomes softer as it is worked). I added a little more MixQuick but kept the proportions 2:1 Fimo:MixQuick.

Eventually the mass started to come together. Most of the clay held together in a ball with just a few crumbs. I could see that the MixQuick and the Fimo Classic were not thoroughly mixed as the colour was streaky.


Finally, I could roll the clay well enough to make snakes, which I chopped up and recombined to help it mix. Miraculously, by the time the streaks were gone, the pink clay was a workable consistency! I did the same with a batch of orange in an equally crumbly state and it came out just the same, so it could be done with the rest of my clay just as successfully.

This is the bead I copied and I was amazed that the earrings were a perfect colour match and the clay was good enough to make a jelly roll cane and form barrel beads.


Monday, 15 July 2013

Mini-tutorial - Tissue blade holder

Firstly I make no apologies for the gap between posts this time - it is SUMMER! The sun is out and it is gorgeous in the UK. People have stopped complaining about the gloom... and started complaining about the heat. Summer is here at last :)

Today I'm going to share with you a little contraption that has become so much a part of my toolkit that I had forgotten that it was something I even made. It's just always there, by the side of my ceramic tile, and I take it utterly for granted. So, in honour of my little tissue blade holder that sits so patiently doing its job and asking nothing in return, here is my tutorial for making one of your very own to take for granted for many happy years to come.


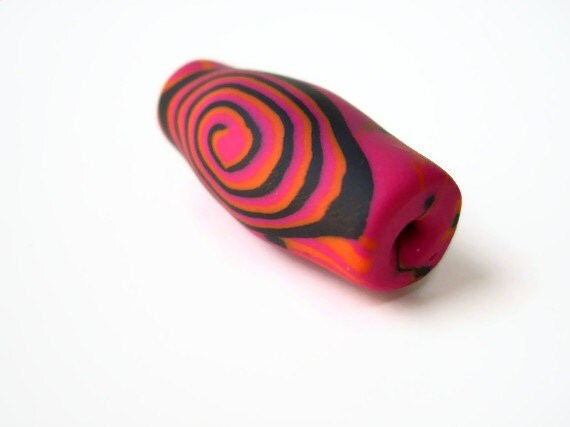
Here it is in all its glory. Basically what this little thing does is keep your blade upright, with the sharp side pointing downwards, so it is always easy to pick up. Tissue blades are thin - when they're lying flat on something they're really hard to pick up, and I always end up sliding them to the edge of whatever surface they're on, or scrabbling with my fingertips to get a grip on an edge. If we were in a lab this would be totally unacceptable from a Health & Safety point of view. Keep that blade visible, easy to pick up and sharp side down!

Here are a couple of close ups so you can see what the tissue blade holder looks like properly. From above you can see the groove where the blade sits is quite narrow.


From the side you can see how far down to cut the groove.


Anyhoo, on with the making part. This is ridiculously easy! Take a small handful of clay - scrap is fine if you have it, if not then choose a colour you like. Roll it into a ball. If you want to add a veneer add it now and smooth it all over, or if it is precious, wait and only cover the visible part of the holder.

Once you have a ball of clay, press it down onto your worksurface and flatten the bottom until you have a dome. It should be about the same size and shape as a chocolate marshmallow teacake. (Totally gratuitous teacake shot coming up... ta daaaa)


I joke, but this really is just the right size and shape for your tissue blade holder. So, once you have your domed ball of clay, the next step is to cut a groove in it for your tissue blade to sit. To do this: hover your blade on top of the dome, look down on it from above and centre it, then cut down, about 2/3 of the way through the dome. (Obviously you don't want to go all the way through, otherwise you'd just be left with two halves - 2/3 is about right as it is enough to hold the blade steady, but leaves enough of the base of the dome intact so the holder remains solid.)

Here's that side view again so you can see what I'm talking about - or it would be if Blogger didn't decide you can only link to photos older than the one you previously linked to. (Why do you do that Blogger? Why do you live in the past? Did someone hurt you?)

Basically you're gonna have to look at the one further up the post. Blogger is being a tad passive-aggressive today. Here's a picture of a baby armadillo to make up for it. (BTW - never ever make a typo when searching for cute baby armadillo pics on the internet. An image of an Armadildo is not something you want burned into your retinas for all time. Yeesh.)


Once you have made the initial cut, wiggle the blade around slightly to widen the groove. I tend to focus on widening the groove at the top, and leave the bit at the bottom quite tight. You could stick two tissue blades in side by side if you wanted to, to make the groove wide without mashing it up too much.

And that's it. I wouldn't fiddle around with it too much at this point or you risk distorting the groove and then the blade might not fit. Stick it in the oven and bake it, and then worry about fixing any minor imperfections after it is cured. Once cured it can be sanded and polished and finished in any way you like. Just avoid sanding the groove too much, or adding any sort of finish into the groove that might dull the tissue blade.

So there you go. Make a load and give them to your clayer friends. Make custom ones - try one for a ripple blade. Make one to stick your needle tools into. Get creative. And feel free to send me pics (...of your tissue blade holders. Unless of course you're really really ridiculously good looking, or you're an ageing bazillionaire looking for a wife and you're sending me pics of your mansion, your olympic-sized swimming pool and your most recent ECG*.)

*I'm  kidding. Pretty sure Mr Blind Crow would disapprove of that, unless you're also looking for a pool guy / masseur and when you croak you're willing to leave all your posessions to your new wife and pool guy / masseur ;)