Monday 21 July 2014

Experiments with polymer clay: Hair toys (sticks and forks)

Yeah, boring title I know. The reality (for a craft nerd like me) is far from boring.

Summer is always my best clay time. I can sit in our kitchen overlooking our little garden and work until much later than in winter because the light is so much better. Have you ever tried mixing a gorgeous colour one evening only to find it looks totally different the next day? That's electric lighting giving everything a yellow cast. Always do your colour mixing in natural light. (Using reliable colour recipes is the only exception, but even then natural light is better.)

But that's not what I want to talk to you about today. Today I want to talk about hair toys! Besides the ridiculous name, hair toys have a lot going for them. Once you've figured out how to use them (which with YouTube is very easy) they'll quickly become your favourite way to tie up your hair. They come in two flavours - sticks and forks. Sticks are essentially short chopsticks of 6" or less in length, and forks usually have two or three tines and are usually 5" or less in length. They can be made from many different things, but nobody seems to have fully explored their potential in polymer clay. Yet.

Well, I've been having a play and so far my results are encouraging. Cue photo montage and Eye of the Tiger soundtrack ;)
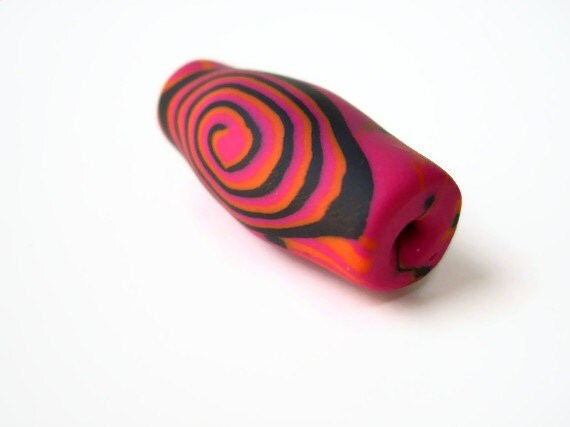
6" Hair stick 1


The tip broke off my first hair stick as the armature didn't go all the way to the end, so I had another go with a longer armature. Here is 6" hair stick 2 (plus pics showing carving and sanding).


And a prototype for a hair fork. I was not at all confident that this one would work so I have used scrap clay and haven't sanded or polished it. It's holding up alright so far though. I have put it into my hair on two occasions and it has survived.

4" Hair fork


All back-of-the-head photography is my own. The things I do for science ;)


Tuesday 10 June 2014

Plus ça change

I've finally got my hands on my clay after far too many weeks of other priorities and I'm having FUN. This is the result of a couple of days' playing with colour palettes and taking a scrap of mokume gane that was so-so and letting myself break all my rules :)

Monday 7 April 2014

Mini tutorial - Conditioning extremely crumbly clay

Several years ago I switched from using Fimo Classic to Sculpey Premo!. Although I like FC for many things, I found it very hard to condition and at the time I was suffering from RSI so also found it quite painful to knead the stiff clay. I hung on to my Fimo stash, but switched to the softer Premo! for almost everything. I had almost forgotten I had the Fimo until a couple of weeks ago when a customer commissioned me to make some earrings to match one of the older focal beads in my Etsy shop. I wanted the earrings to match exactly, so I knew I would have to use the same brand of clay to make them (actually, the same packet of clay as it turned out). So I dug out the Fimo and this is what I found...

The clay was rock hard and very crumbly. It was impossible to work. In fact, it was so hard that I wondered if I would even be able to use it. But I had a block of MixQuick in my toolbox and an order to fill, so I had nothing to lose.

 You can see how dry the original clay was. In fact since I tend to use Sculpey additives with Premo!, the MixQuick was quite dry too!

 I chopped the pink Fimo Classic into thin slices and let it crumble. This is quite a messy technique, so make sure you work on a large tile and that you lay plastic on the floor if you have carpet or you'll be picking crumbs of clay out of the shag pile forever.

I started with about a third MixQuick and chopped it up along with the Fimo Classic.

Close up.
It stayed very crumbly for a long time and was very hard to work. I had to rub the mix through my fingers as if I were rubbing fat into flour to make pastry. I rubbed then squeezed the mass together, then rubbed some more. I tried to manipulate the clay as much as possible but I think Fimo reacts to heat rather than manipulation (unlike Premo! which becomes softer as it is worked). I added a little more MixQuick but kept the proportions 2:1 Fimo:MixQuick.

Eventually the mass started to come together. Most of the clay held together in a ball with just a few crumbs. I could see that the MixQuick and the Fimo Classic were not thoroughly mixed as the colour was streaky.


Finally, I could roll the clay well enough to make snakes, which I chopped up and recombined to help it mix. Miraculously, by the time the streaks were gone, the pink clay was a workable consistency! I did the same with a batch of orange in an equally crumbly state and it came out just the same, so it could be done with the rest of my clay just as successfully.

This is the bead I copied and I was amazed that the earrings were a perfect colour match and the clay was good enough to make a jelly roll cane and form barrel beads.


Thursday 6 March 2014

Mini tutorial - Improvised bead rack

This is hardly a tutorial so much as a shared idea. If you only occasionally make beads a dedicated rack can take up too much valuable space in your craft room. On the fairly rare occasions that I make beads I improvise a rack using large cutters like this, the top of a can that doubles as a bangle mould, or a shallow box (Green and Blacks miniatures boxes work very well, you just need to reinforce the corners with tape as repeated baking in the oven weakens the glue).

So there you go - see how inventive you can be!

Monday 30 December 2013

I'm Craft Britannia Shop of the Week #75!

Wow, I had a blog-neglect wake-up call today... I forgot the link to my own blog!! I'm utterly embarrassed and chastened. I promise I'll post more in 2014.

Things I have neglected to post about include a lovely working trip to see my fiance in Tunisia, turning my living room into a sweatshop for most of December to produce homemade presents for friends and family for Christmas, and my shop being Craft Britannia's Shop of the Week #75!

Check out my Craft Britannia Shop of the Week interview here.

And here's some eye candy too, 'cos you're lovely ;)


Tuesday 12 November 2013

Be careful what you wish for...

Only last week I was complaining that I was so busy with editing work that I had been forced to neglect my crafts. Well, here's a lesson in being careful what you wish for, because two of my clients have turned out to be flakes, and I have had to accept that they're simply not going to come through with the goods.

So I spent yesterday at my very lovely client's ceramics studio in Bermondsey pummelling clay into submission and generally having a wonderful time. There's something exceedingly therapeutic about thwacking a pound and a half of wet clay onto the wheelhead and wrestling with it until it runs smoothly through my hands. She has new bats too - the wooden kind for clay, not the furry kind, although with the squeaky flash going off in the next studio it did sound like there were delinquent bats in the belfry! Anyway, these new bats are smooooooooooooooth and most importantly, level. I threw my biggest and best bowl yet. And now I wish I had a picture of it to show you, but I don't, so here's a shot of the rest of my day's output instead.


I'm so excited for that red in the top photo - it's a velvet underglaze - doesn't that just sound gorgeous?

And while we're on the subject of gorgeous things - and of the fickle nature of freelance workloads - here with unprecedented frequency is the next Craft Britannia Shop Of The Week!

May I present to you the wonderfully named, and incredibly talented Feather and Sixpence. Their quirky watercolours are cool, warm and fuzzy all at the same time. They're like listening to The Lumineers on Bonfire Night with your hands wrapped around a hod toddy and your sweetheart's hands wrapped around you. Check them out, I urge you.